How To Deploy a Website In Less Than 5 Minutes
These days, competitive cloud providers have some great free resources, which are plentifully sufficient for a simple website. In this post, I share my process for deploying a website in less than 5 minutes, with continuous delivery. We will deploy our website using Azure, through visual studio code extensions and github actions.
Setting Up
First you will need an Azure account. Unfortunately, you will need to add card details, but don’t worry we will be using a free tier so you’ll never be charged. You will also need visual studio code. There are of course ways to deploy without VS code, however I find the Azure extensions to be the simplest way to quickly deploy. You will also need the following three VS code extensions:
Finally, you will need a github account, as we will setup our app to be deployed with CI / CD, whenever the main branch is updated. Once, you have these requirements setup, we’re ready to go.
Creating an Application and Repository
If you already have an application you wish to deploy, you can skip this step. For the sake of demonstration we will be deploying a default Vite app. So we will follow a few simple steps to create an app and make a repository.
To start with we will make a vite app, by opening vscode and opening (or creating) an empty folder. We then use the command,
npm create vite@latest . # Create a vite app.Follow the setup steps and Boom we have an example app.
Next we will create a Github repository. If this is new to you, here is all you need to know to get started. Once we have our remote repository we will add our vite app with:
git init   # Create a local repository
git add *   # Stage our new Vite app
git commit -m "initial commit"   # Commit the changes
git remote add origin git@github.com:<Your github account>/<Your repository name>.git
git push -u origin main   # Push our changes to the remote repo
At this point you should have a remote repository with our new vite app in it, and we are ready to deploy.
Deploying our app
Now in VS code we want to open the Azure tab in the side bar and log in to you account. Then you’ll have a menu something like this:
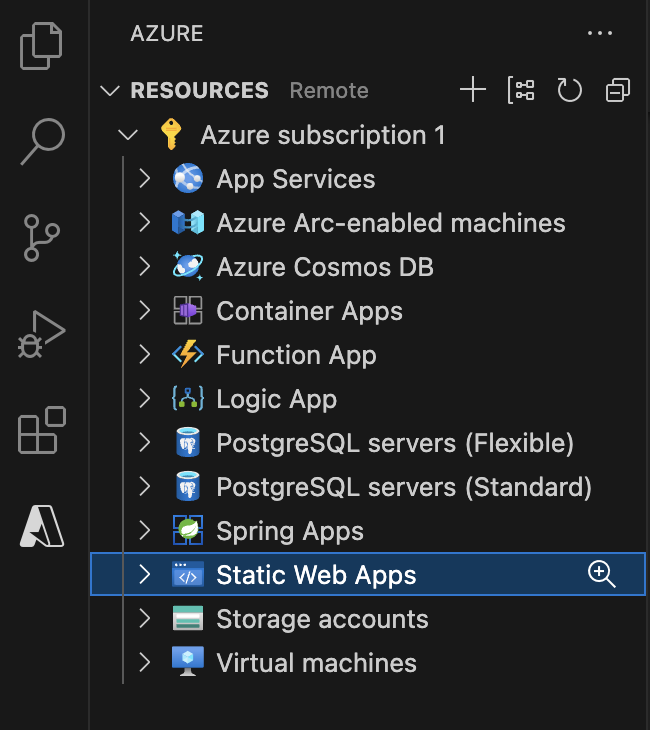
Right Click Static Web Apps and select Create static Web App.... Enter the name of your app, a region to deploy, and When prompted for a preset configuration (as seen below) select HTML.
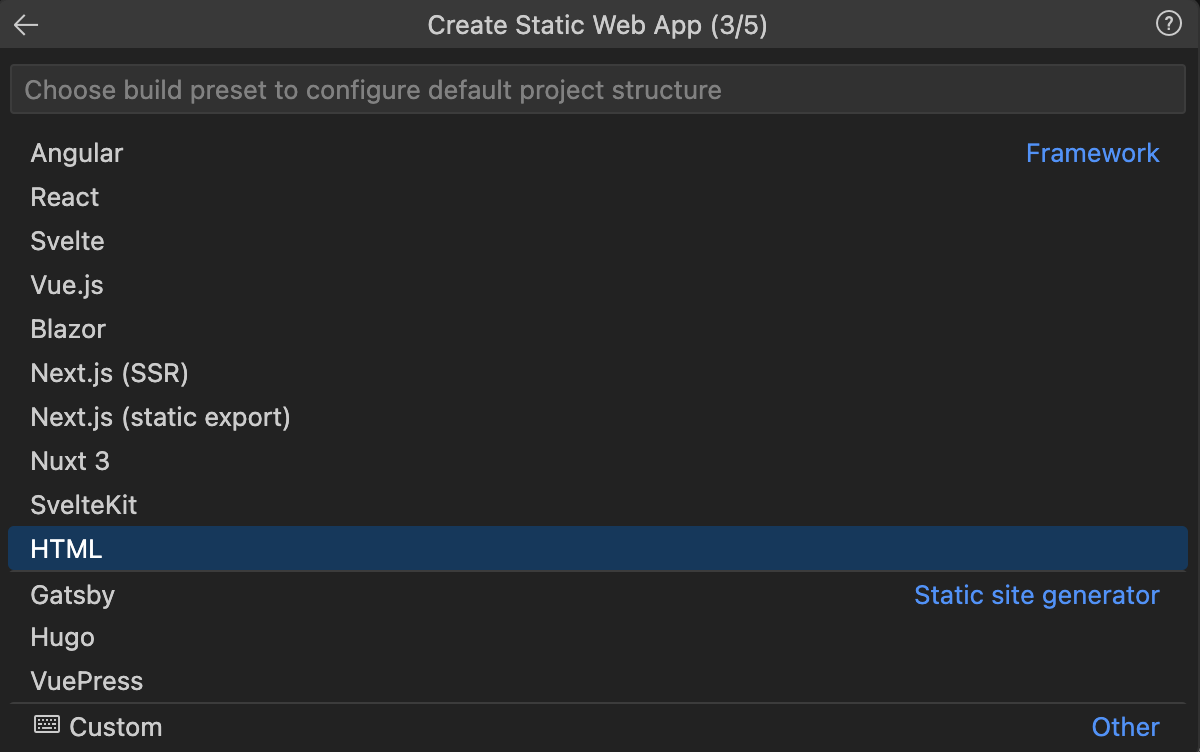
When prompted for your application folder, output folder and api folder the expected values depend on your application. If you are using a Vite app like in this example you want to enter, /, /dist then leave the api blank.
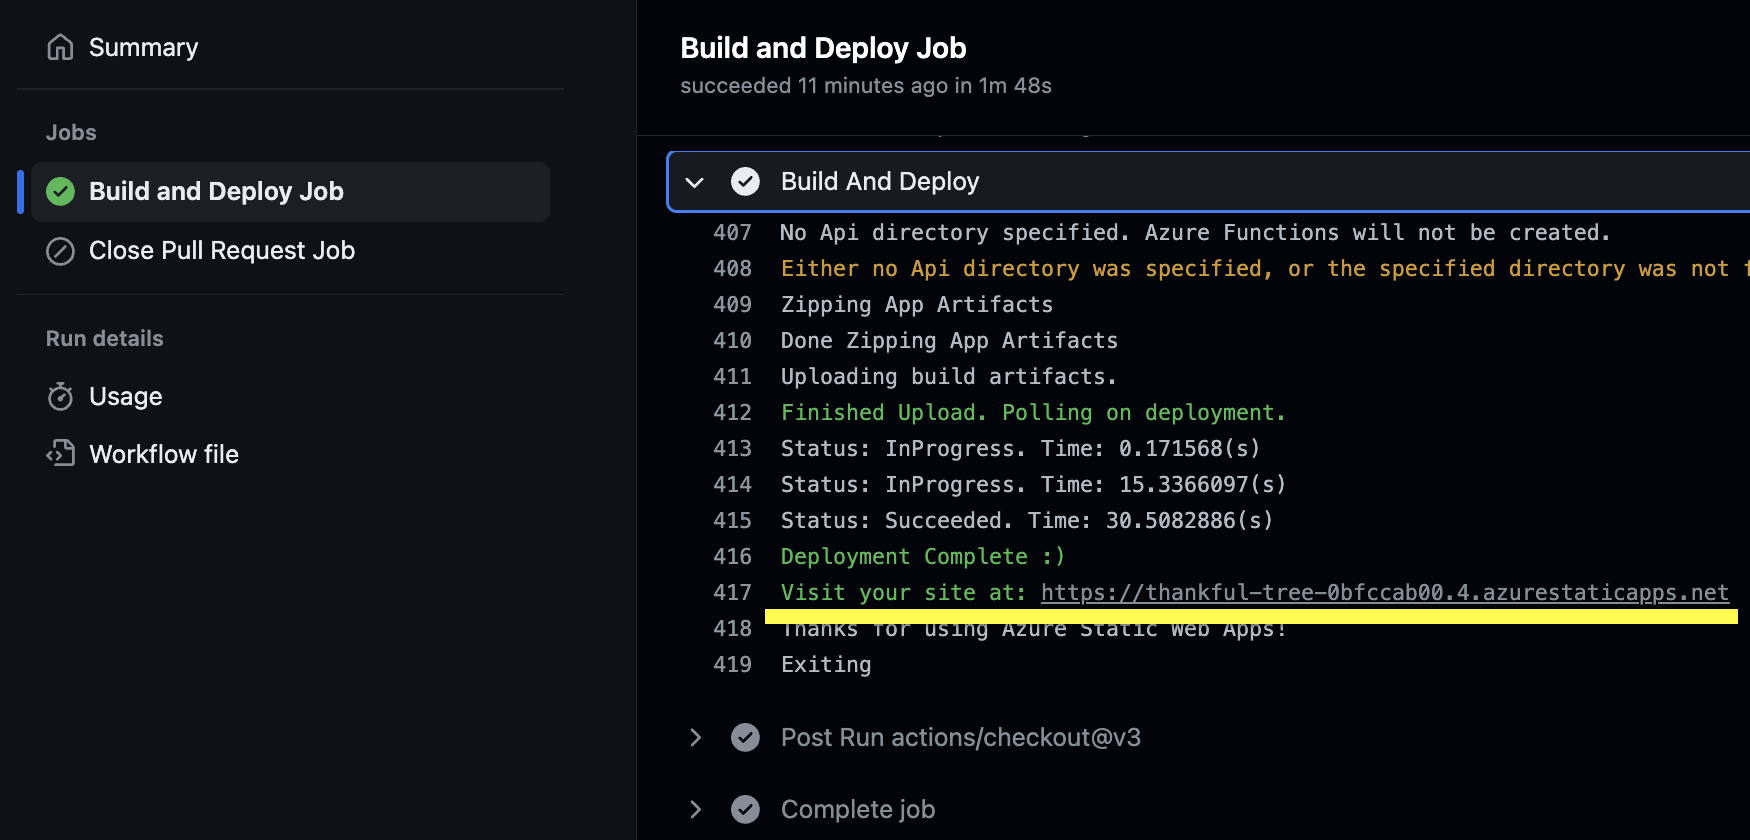
At this point Azure and the plugin will start setting up you site and will add a github action to your repository.
Now if you go to Github and Open your repository’s actions tab. You should see a Build and Deploy Job. If you open the job you can find your websites url in the output.
Summary
There you have it. Following these easy steps you can deploy a site in just minutes. These steps may take a few extra minutes the first time, but the process is the same every time meaning deploying you next site will be even faster. There are some extra steps you may want to take, such as adding a custom domain, or updating you subscription for better performance and other benefits. For your first time deploying a website, modern cloud providers sure do make it easy.